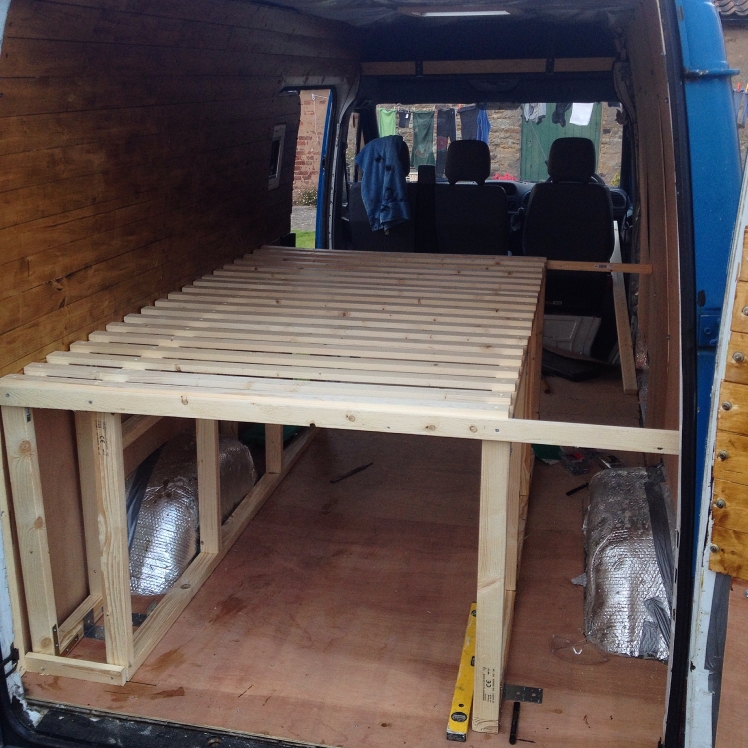
I’m too much of a home comforts lover not to put a full size bed in my camper conversion!
As I mentioned in the previous post, Cladding/ plying the interior, I’m roughly copying/ adapting SprinterVanDiaries‘ layout. A full size bed takes up a lot of room, so if you’re still trying to decide on a floor plan, make sure you know your priorities! The big bed incorporated two of my main needs – a full size bed and a large storage area big enough for a fair amount of music gear, my bike and any other bulky travel gear, e.g. a portable toilet (loooovely).
This being the case, I basically followed SprinterVanDiaries’ instructions in making their own bed frame, which I will post here and which you should refer to for full details. I adapted their design to fit my own needs in terms of measurements (you’ll need to know what size mattress you want – I went for a 4ft slim profile memory foam mattress to give enough room for the cupboards at the side of the bed and to leave enough headroom to sit up in bed.) I also didn’t incorporate some of the intricacies of their construction e.g. the pull-out storage seat, hidden compartments etc.
SprinterVanDiaries – Bed Frame Construction
A brief description of my own construction –
The bed frame was basically three separately-constructed frames which would be fastened to the floor and beams attached across, like a real bed with wooden slats.
Frame no.1. Made of thick timber from Wickes, each piece glued and fastened with L or T brackets. I made two identical frames like this and one that would sit over the wheel arch on the left hand side.
The finished bed frame. I attached supports between the two close left-hand frames, then long beams across each end and slats across the top to provide a sturdy podium for the 4ft mattress.
The height of the bed frame was measured EXACTLY to fit my bike with the seat and front wheel detached as well as any other music and bulky gear.
I wanted to be able to access the under bed storage mainly from the rear doors, so the rear end was left entirely open as you see it. I also wanted to be able to access the storage from the front inside of the van, but via a door.
So I set about creating a front to the bed with a door.


Terrible quality snapchat photos, but they illustrate!
To create this I attached sections of plywood (reused offcuts from previous jobs) to the front of the bed. I attached an extra beam between the floor and the underside of the bed frame to attach hinges to (cheap standard hinges from The Range). I also attached a bolt to lock the door shut (The Range, cheapo bolt). Then it was just a matter of cladding as I had done elsewhere.


